Exposure For Beginners: An Introduction To Manual Modes
The digital camera makes it possible for anyone to snap a photo. Just point, and the camera chooses the settings. But, frankly, like any technology, it has its limitations, and a lot of them. Automated modes don’t choose the best settings for depth of field. They don’t allow for creative blur techniques. And in many instances, auto doesn’t even get the exposure right.
If you bought a DSLR or other advanced camera and haven’t yet ventured off of auto, you’ve wasted your money. Manual modes allow for the ultimate creative control—that’s something even a fancy camera can’t do for you. Ready to really get some use out of the hundreds you spent on that camera? Take full creative control over your photography with this introduction to manual modes.
What is exposure?
A digital camera works by exposing a sensor to light. Exposure, then, is how light or dark that image is, based on just how much light that camera sensor was exposed to. An overexposed image has too much light, or is too bright, while an underexposed image is too dark.
There are three camera settings that determine exposure: aperture, shutter speed and ISO.
 Aperture
Aperture is the size of the opening of the lens. Just like a large window lets a lot of light into a room, a large open aperture lets a lot of light into the image. If your image is too dark, opening up the aperture will help. Aperture is measured in f-stops, with small numbers indicating a wide opening. An f/1.8 is very wide, while an f/22 is a very small opening.
** Shutter speed **
Shutter speed** **is how long the sensor is exposed to light. A shutter inside the camera lens opens and closes each time an image is taken (the sensor is exposed to light when the shutter is open). Shutter speed is measured in seconds and fractions of a second. A three second shutter speed is very slow, while a 1/16,000 s. shutter speed is very fast.
 ISO
ISO
ISO is just how sensitive the camera’s sensor is to light. A low ISO, like ISO 100, is not very sensitive light, which is perfect for shooting outdoors during the day but not so great for scenes with low lighting. A high ISO, like ISO 6400, is a big boost for taking photos at night.
Aperture, shutter speed, and ISO combine to form the exposure triangle; changing just one setting will affect the exposure, but you could also change a second or third setting to balance out the first change, resulting in the same exposure. But if the exposure was balanced in the first place, why change your settings?
What else can you do with manual modes?
Each setting also has an impact on another element in the image, besides just the exposure:
- Aperture has a dramatic effect on depth of field, or how much of the image is in focus. A narrow aperture like f/22 will leave most of the image sharp, like in a typical landscape photo. A wide aperture, like f/1.8, will leave only a small part of the image in focus, resulting in a soft background, like in many portraits. A narrow aperture allows the photographer to include more details from the entire scene, while a wide aperture results in a soft background that draws more attention to the subject.
- Shutter speed has a big impact on blur in an image. Anything that moves while the shutter is open will result in blur. Fast moving objects, like athletes and race cars, need a fast shutter speed. But sometimes blur is intentional. A slower shutter speed is used to blur the motion of a waterfall, for example. Slow shutter speeds are also used with techniques like panning and zoom burst.
- ISO determines how much noise, or graininess, is in an image. Images shot at high ISOs have noise and can even loose some detail. As a general rule, it’s best to leave the ISO as low as you can, though high ISOs are often needed to use a higher shutter speed in limited lighting.
Manual mode, then, isn’t just a matter of getting a good exposure, but also using the settings to adjust depth of field, blur and noise.
What is an exposure meter?
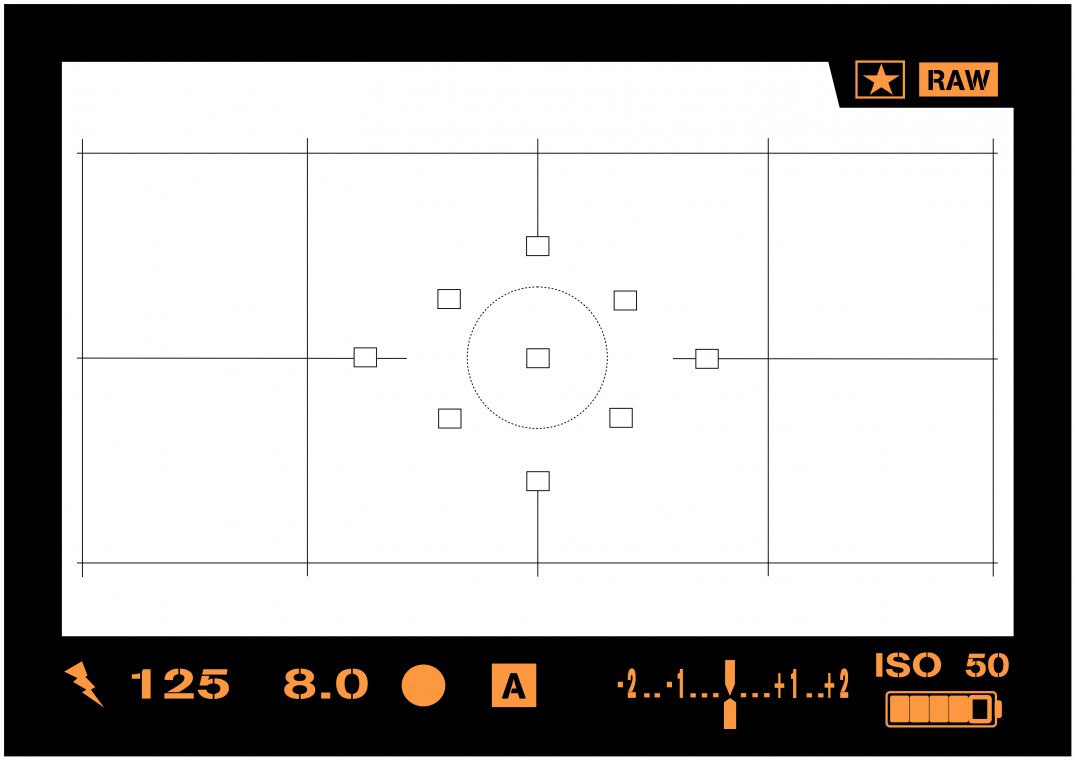
Choosing exposure settings isn’t all guesswork either. The exposure meter helps guide your choices to avoid ending up with a very dark or very bright image. For example, in the photo below, the exposure meter is at the bottom of the screen. It’s the horizontal line that’s marked with a -2, -1, 0, 1 and 2. Some cameras have the meter built into the side of the viewfinder instead of at the bottom.
 When the arrow points to the 0, the exposure is good, according to the camera’s built-in light meter. Different factors can throw the meter off a bit, however, so it’s still good to check the images on the back of the screen and adjust from there.
Using manual modes
Getting acquainted with manual modes doesn’t just happen in one shot, it’s a learning process. Thankfully, you don’t have to jump right from auto into full manual. There’s a few partial manual modes that even pros still use on occasion.
Most cameras with manual modes will have at least one control dial, where the dial adjusts shutter speed or aperture and holding the Fn or function button switches between the two. Other cameras have two dials, one for each setting. Often, there’s a shortcut for the ISO, while other cameras require heading into the menu. If you’re not sure, consult the manual for your particular camera.
 Programed auto, or P
It is still mostly an automated mode. However, by turning the control dial, you can choose different combinations of shutter speeds and aperture, and also set the ISO separately. Programed auto is a good option for those new to manual modes. Head out with your camera and try different combinations of shutter speed and aperture settings and watch how the images compare. Look for things like blur and how much of the image is in focus.
Aperture priority mode, or A (Av on Canon)
It allows the photographer to select the aperture setting, while the camera automatically chooses the shutter speed. Aperture priority is used when the depth of field is the most important, and shutter speed doesn’t matter too much, like when shooting a portrait or a landscape.
Shutter priority mode, or S (Tv on Canon)
It allows the photographer to control the shutter speed, while the camera automatically selects the aperture. Shutter priority is often used in sports, because the shutter speed is the most important setting. If the lighting is uneven, shutter speed means the photographer doesn’t have to frequently adjust the aperture for the right exposure.
Manual, or M
It is full manual mode, where the photographer chooses aperture, shutter speed and ISO. It’s the best option for having full control over the image. However, sometimes S or A modes are preferred when there isn’t sufficient time to change each setting between each shot.
Manual modes give the photographer full control over the image. While manual mode allows for total control over the exposure, aperture, shutter speed and ISO have other effects on the image too. Using manual modes becomes both a way to control the exposure as well as to control the depth of field, blur and noise in an image.
Manual modes can be confusing at first, but they’re essential to taking your photography to the next level. Head out with your camera and take some time to play around with the manual modes, watching how different shutter speeds, apertures and ISOs affect the photo.
Looking to sharpen your photography skills? Join our top-rated professional diploma in photography today!


