Learning how to play guitar tabs can be quite a mystery for some of the newer players out there. That’s mainly due to a lack of any formal training on reading guitar tabs. Tablature or Tab is a very important tool that empowers guitar players to learn the art of playing chords, melodies, and new songs.
In other words, the quintessential hack that allows you to swiftly learn how to play new songs, without going through the rigorous and intense process of learning theory skills, scales and music reading, is guitar tabs.
Guitar tabs are your best bet in order to swiftly get the job done, and this is where we teach you how to ace your guitar tab reading skills.
The perfect guide to read guitar tabs:
Introduction –
Once you’re familiar with the 3 basic numbering systems that all guitar players need to essentially know, let’s start with what guitar tablature represents.
The written form for tabs consists of 6 lines that represent the 6 strings of the guitar. The thickest and bass string (E bass) is the lower one, while the thinnest and acute string (E acute) is the top one. The other ones follow the same logic that the instrument represents. The easiest way to remember this is that the top line is the thinnest string and so on.
In each string, we put the number that represents the fret of the fretboard that should be pressed. Also, the frets are numbered 1,2,3,4 and so on, as you move toward the body.

So, in this example, you simply play the third fret on the A string, followed by the fifth fret, and back to the third again. Keep in mind that guitar tabs are read from left to right, just like you would read a book. That means the only time you’ll play multiple notes at the same time, is when they are stacked on top of one another like this
Guitar tabs might be the gateway that eventually allows you to learn songs overnight; it is still an art that needs to be mastered with time, practice and proper guidance. After all, learning how to read guitar tabs is almost like learning a new language altogether, and that can only be done with proper education, gradual progress and a lot of practice.
How to Read Guitar Tabs for Chords
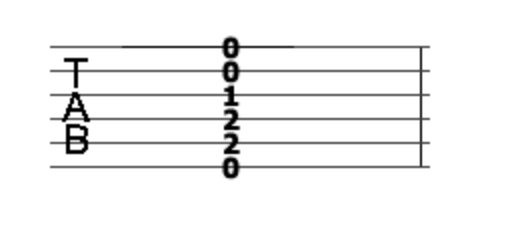
As discussed, when multiple numbers are stacked one on top of another, it means that those notes need to be played together at once. That is how the guitar chords are represented.
The art of playing guitar chords seamlessly only comes down to finger placement while you’re doing it, and how to switch your fingers from one chord to another. Most of the battle is won there itself and the rest through practice – lots and lots of practice, till your fingers start working faster than you can think they possibly could.
The strings that we should not play in a chord are often marked with an X on their respective string lines.
Even though there are ideally accepted finger placements that are most commonly taught, you should focus on what works naturally for you in the flow and keep at it.
Reading Guitar Tabs for Riffs
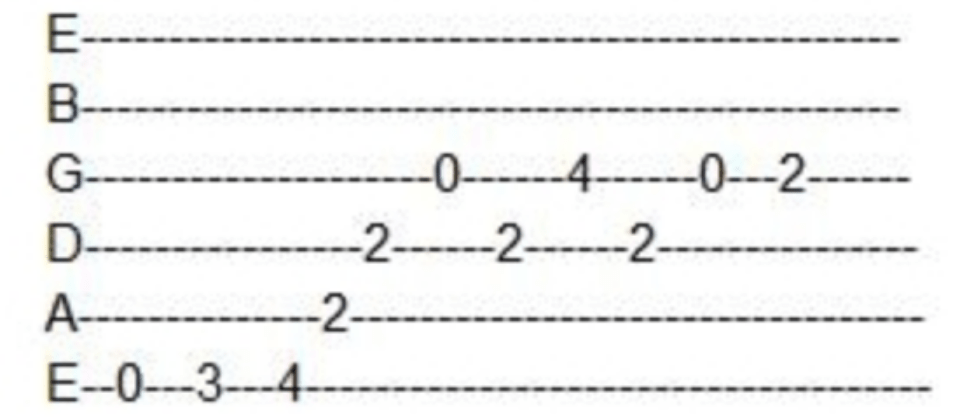
A guitar riff is a series of notes that are repeated throughout a song that looks like this.
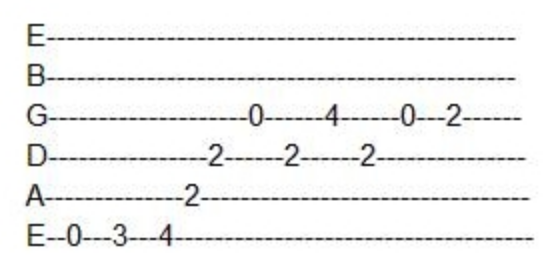
Though they seem complicated, they are pretty easy to read and play, too. In order to learn how to read guitar sheet music, it’s important to work in small sections and gradually proceed from left to right, playing each note.
Developing our hand-eye coordination to practice reading guitar tabs while we play, is a skill that takes time to craft and that comes only from practice. Allow your brain and fingers to function on the same page fluently and you might start sounding like Jimi Hendrix sooner rather than later.
Remember: practice makes perfect, and that’s all there is really.
Point of caution – Rhythm is not notated precisely in guitar tabs. To get the correct rhythm, you need to listen to the original and develop a sense for yourself.
Intermediate Skills :
As you learn how to read guitar sheet music, there are certain common symbols that are used to convey different techniques that you might come across.
It’s important that you become familiar with these as well, in your journey to forming the next Beatles.
Hammer-on
As the name suggests, it consists of hammering the string in a specific fret with the left hand, without the right hand (what plays the note is only the left hand). The letter h beside the number shows which fret should be played. The second note is sounded by slapping another finger down on to the fretboard. This results in a quick change between notes.
Pull-off
This is done by placing both fingers on the notes to be played. Accordingly, pick the first note, then sound out the second note, thereby pulling off the higher finger, leaving the second finger still fretted.
When you pull off, slight friction against the string will increase the sound of the second note. The pull-off can also be represented by the letter p. Its technique represents the opposite of a Hammer-on. These two techniques use to be used together.
Bend
Bending is a pretty common element of guitar tabs. You can understand when you are supposed to bend a note by finding an upward pointing arrow next to one or more numbers. The indicator next to the arrow defines the distance you are supposed to bend. It works by raising or lowering a string with the fingers of the left hand, with the aim of reaching the sound of the frets that are after the one that was pressed.
Slide
Slides are represented with a forward-slash or backslash between two notes in guitar tabs. Play the first note, then slide the same finger up to the second note by going from one fret to another, sliding the finger through the frets. Do not pluck the second note
Vibrato
This works by vibrating the finger after pressing and playing the string and a specific fret. You do that by basically shaking the finger as if you were doing a lot of short Bends quickly from up and down. It is denoted by a squiggly line. Its also known as a quavering effect.
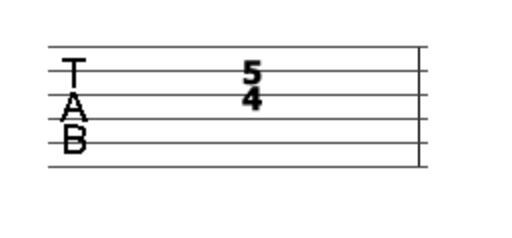
Tapping
It consists of hammering one string in a specific fret using the right hand instead of the left one. It is basically a reflection of the hammer-on and pull-off technique but made possible by using your right hand instead of the left one.
Tapping is represented by the letter “T”, indicating which are the fret and string that should be pressed with this technique
Additional Resources –
All of this is made quite easy with the help of an essential professional guitar training course that starts from the ground up, takes you step-by-step through the entire process, and gets you in touch with world-class guitar professionals to help you in your journey.
That being said, nothing comes easy, and it will require a bit of patience and more importantly, tenacity on your part to pull through this journey as you go at it step by step. All of that is made quite effortless as long as you remember why you’re doing this, and keep having fun while you’re at it.
Looking to sharpen your guitar playing skills? Join our top-rated professional diploma in guitar today!