Easy White Balance Tutorial in Photoshop
While most of the time you are busy taking photos, you tend to overlook one little aspect in photography: The white balance.
You work hard to figure out the point of view, the angle and the position to shoot from and you use your camera to dial in the right shutter speed, aperture size and ISO. You have so much to do before you hit that shutter button that you sometimes get paranoid about missing the shot. You face this especially if you are shooting in public places, or when you are on the move; or in some situation where you cannot actually control the movement of your subjects.
However, a wrong white balance will leave a strong warm or cool colour cast on the image. It will make your images look flat destroying the colour range and depth.
This simple tutorial will show you how to quickly fix the white balance of your images in post processing using something white.
A quick note before you proceed further. There are thousands of ways and millions of tutorials by which you can learn to fix white balance. This is just one quick way. It might not work every time, but I encourage you to experiment it yourself and see what works best for you.
Things you will need
All you need is a picture that requires a white balance correction; Photoshop and your computer mouse. Do not use a touchpad or pen.
Step-by-step process
Got your stuff ready? Now let’s get started with our white balance tutorial.
- Open the image in Photoshop.
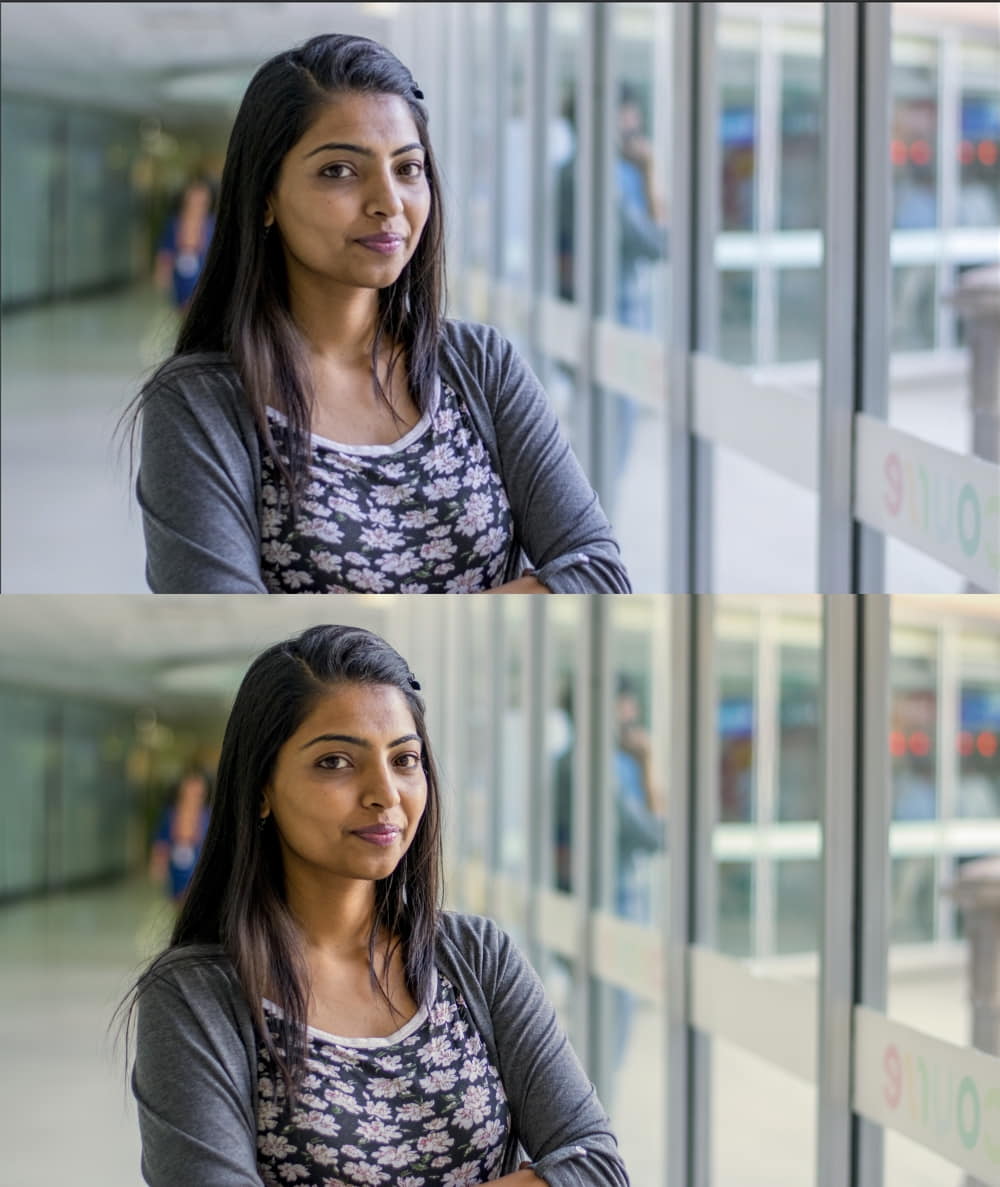
 Just by looking at the image one might think there is nothing wrong with it but, once we are done with the tutorial, you will see the difference.
- From the top menu, go to layers-> New adjustment layers -> curves.

You will see a small dialog box open up.

Just click ok and you will see that this opens the curves graph and adds a curves layer on top of your image.

- In the curves graph, you will see 3 colour pickers on the left. White, grey and black. Double click on the white colour picker.

This will open a colour picker window.

- Now look for an area in your image which you feel should be white; not blown out, over exposed white, something that should actually be white. Like, white clothing, white clouds, white feather, or anything that actually should be white in real time. I will sample this part of the subject’s clothes for white.

- Hold down the ctrl button on your key board (cmd for mac) and click on that white area. From this point on, do not touch the mouse
- Take a look at the colour picker window and make a note of the RGB values. Among the three, pick the highest value and equalize all three of them to that value. To do that use the tab key.

Here, we see that the highest value is 230. Use the tab key on your key board to navigate to the R and G values and change them to 230. DO NOT touch the mouse.

- Once you are done changing the values hit the enter button. A new dialog box will open up, just select OK by using the arrow keys and pressing the enter button.

Yes you guessed it, still no touching the mouse. - Now, carefully ensuring you do not shake the mouse, left click on the image.
- At this point you will see that there is a significant improvement in the colour tones and your image has more depth in colour than before.

However, you will also notice that it has over exposed your image a bit. That’s because the curves layer is in normal mode and it’s affecting all the aspects of the image below it. To make it affect only the colours, this is what you need to do. - On top of the layers’ panel you will see a dropdown menu that reads _Normal

_ - Open this dropdown menu and select colours.

And that’s about it. You just unhide the colour layer using the ‘eye’ icon next to it and you will see how this has affected your image and enhanced its colour.
How it works?
You just pick white, equalize all the RGB values and that’s it. Works like a charm, doesn’t it? However, there is a science behind it.

What you are doing here is not just choosing any colour, you are choosing objects that should’ve appeared white. By equalizing the value of R, G and B to the highest of the three, you are matching the intensity of white to that of the colours present in the image. That is the reason why you see that the increase in exposure level is a side effect of this process.
While changing the layer from normal to colour you are changing its blend mode. The colour blend mode ensures that the layer on top, blends only colours with the layer below it and doesn’t mess with any other aspects of the image.
It also comes in black
Besides white you can try this in something black too. Just equalize the RGB value to the lowest of the three. However, it’s a little trickier than choosing something white because what’s black could appear to be black due to a shadow, but in reality it could be some other colour. If you have real time black objects like hair, black fur and you are absolutely sure that they should be black, then you can go for this method.
Looking to sharpen your photoshop skills? Join our top-rated professional diploma in photoshop today!


