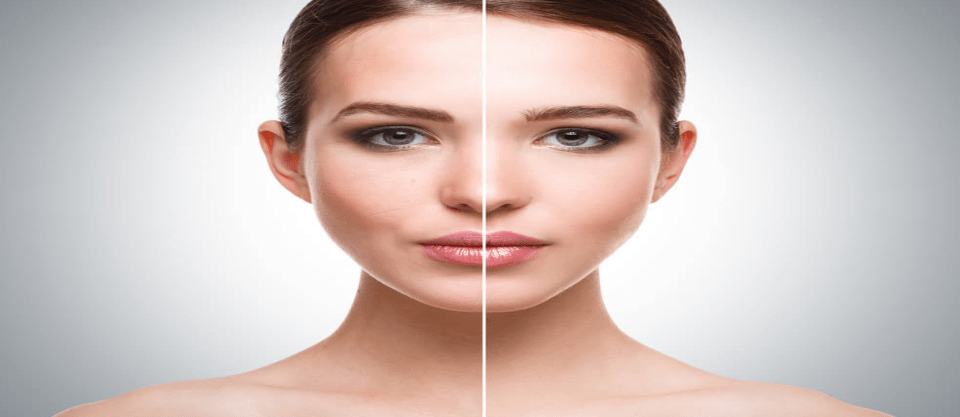
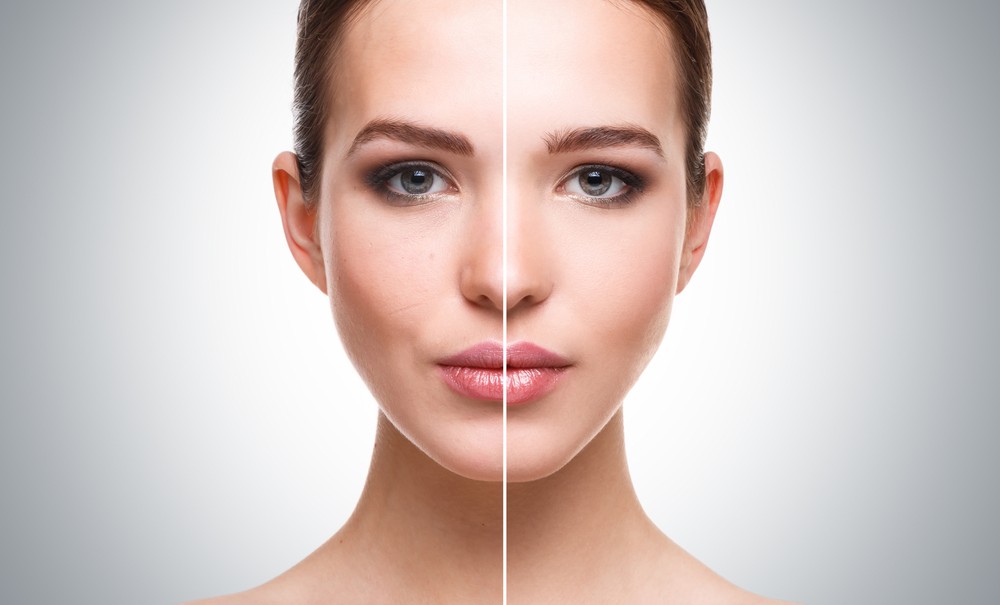
There are literally over a hundred edits that could be made to a portrait. But when you’re taking off weight, hiding freckles and eliminating laugh lines, aren’t you eliminating a bit of who that person is? It’s easy to get caught up in the editing process and actually ruin a portrait instead of making it better. A portrait isn’t a fashion shoot of a model. Chances are, if you airbrush the image, the person in the photo won’t look like themselves and could even be offended by how much retouching you do.
But, a few subtle adjustments can perfect a portrait, eliminating distracting elements and calling attention to just the right parts of the image. So where do you draw the line? We’ve rounded up a portrait editing checklist to help you find that line between nice subtle adjustments and air brushing gone wrong. Here’s what you need to ask every time you edit a portrait.
Is the exposure accurate?
 First, make sure that the basics are dead on. Check the exposure. It may need a bit of lightening or darkening. The camera measures for exposure based on the colors in the scene, so the color of the subject’s skin or clothing can throw the exposure off a bit. If you shoot in RAW, an exposure that’s slightly off is an easy fix using the exposure slider.
Is the white balance off?
While you’re in the RAW photo editor, check to see if the white balance could be improved. Note that I said “improved,” not accurate. A white balance that is a little on the warm side, instead of perfectly set, is usually more flattering for a portrait. Warming up the image a bit livens up the skin tone, without that over-edited look.
Should you crop in closer?
A good portrait should immediately draw the viewer’s eye to the subject. Make sure there aren’t any distracting elements in the background. If there are, consider cropping. If cropping won’t help, you can use the clone tool to eliminate them instead. Sometimes, a crop is a matter of getting a more intimate feel than the original photo, and filling the frame a bit better. Try cropping a bit and see if it improves the photo.
Do the eyes stand out?
Getting the eyes right is essential to a good photo, so spend some time here. The eyes may need to be sharpened a bit. Often, the whites aren’t actually white—using the dodge tool will brighten them up a bit and help them pop. Darkening the iris can also help the eyes to pop; the burn tool is a quick fix for that. Also look for any redness, and check for stray eyebrow hairs or eyelashes too.
Are there any blemishes to eliminate?
While it’s not a good idea to airbrush a portrait, it’s a good idea to zap any imperfections. Things like birth marks and scars that are always there are best left in the photo because they’re part of who that person is, but a temporary acne breakout is not. Use the healing brush to smooth over skin blemishes and other temporary imperfections.**
**

Is the skin smooth, or can you notice individual pores?
There’s a downside to high resolution, high detail cameras. All that detail makes it easy to see individual pores on the skin. Keep the detail where it matters, like in the eyes, and keep it out of the skin. Use a blur tool or a blurred layer if there’s too much detail in the skin. Be careful though, here is where it’s very easy to go overboard and cross the line from retouching to airbrushing.
Is the skin too red?
Maybe it was warm out that day, or maybe your subject was blushing a bit. Whatever the cause, skin redness is a common problem in portraits. There’s a number of ways to fix the problem. Use a targeted adjustment brush in the RAW file editor, or use a hue saturation layer with a layer mask painting the effect only where you need it.
Is the skin too shiny?
Skin shine is another common problem, and since shine spots on the skin are often created more by the photographic set-up than the person, it’s a good thing to eliminate. Use the healing brush tool to swipe away any distracting shine created by your lighting set-up. It’s okay to leave shine on the lips, though, particularly when editing a woman’s portrait.
Are there shadows under the eyes?
Lighting in photos can often add shadows under the eyes, even if the subject is well rested and doesn’t actually have shadows there. Thankfully, they are an easy fix. Sweep the dodge tool over any shadows under the eyes for a quick and easy brightening.
Is there glare on eye glasses?
Eye glasses are often a problem in images, throwing off glare from the light. If you can’t tilt the subject or the light to eliminate the glare as you take the photo, take a second photo of the subject with the glasses off, so you can easily clone out any glare. If you didn’t take that second photo, it’s still possible to clone out the glare, just a bit trickier. You may need to use layers and clone the eye with the least amount of glare, and flip it.

Do the teeth need to be whitened?
Lighting often makes teeth appear more yellow than they are in real life, so they’re a good thing to check before finalising a portrait. Minor yellowing can be fixed with a quick sweep with the dodge tool, though that doesn’t work in every scenario. Use the hue/saturation adjustment, yellow channel, to whiten them. A layer mask allows you to paint the effect only on the teeth.
What about the hair?
Don’t forget to check the hair before you finalize your shot. Fly away hairs can be easily cloned out so that they don’t distract from your subject. Check for any stray pieces around the neck or over the face as well. Use the healing brush or clone tool to correct them.
Are there any love handles or double chins that could be tightened up?
Weight loss is right there with airbrushing, you want your subject to look like themselves. The best thing to do is to check your pose and make sure it’s flattering before you shoot. In some instances though, it may be okay to tighten up a double chin or love handle, if you’re not taking away from the person. If the fault is yours, such as a bad pose on a subject that really doesn’t have a double chin, then it’s best to correct the problem (or use a different shot). The clone tool can help here.
Did I edit too much?
Before you save that portrait, there’s one more thing to check. Did you edit too much? It’s a common problem, particularly with new portrait photographers. Does the subject look like the best version of themselves? Or do they look like they’re supposed to be in a magazine? Remember a portrait is different than a photo of a model for a magazine. The goal isn’t perfection, but capturing the essence of a person. You can’t do that if you edit most of the person away.
There’s a thin line between a great edit and too much editing on a portrait. Clone the background layer before you get started so you can easily see what the image looked like before, and check each edit to be sure you’re making the shot better, not worse.
Looking to sharpen your photography skills? Join our top-rated professional photography classes today!


