Dramatic, unusual photos don’t have to be manipulated in Photoshop. A double exposure gives you a great dramatic shot without the need to re-touch in Photoshop. A double exposure is two images, exposed on the same sheet of film—or in the case of digital, the same digital file. On most modern digital cameras, a double exposure can be done in-camera, without any post processing at all. Intrigued? Here is how to take double exposure images without using Photoshop.
Take the base photo.
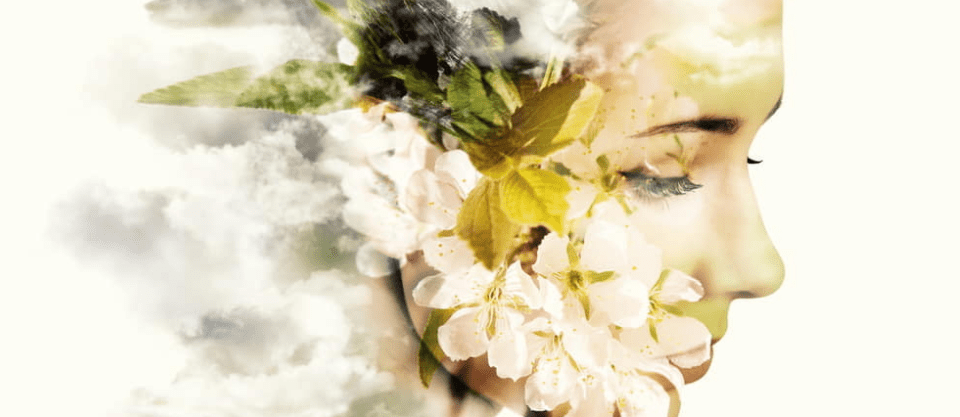
A double exposure involves two images. The first step is to hunt out that first image. Silhouettes work great for the base image of a double exposure. You can create a silhouette with any subject, but a popular option is to take a silhouette of a person’s face. The key in getting a good base photo is to have lots of contrast—that’s why silhouettes work well. Aim for a dark subject, with a bright or even white background. You can shoot using a white background, or simply use spot metering and overexpose the background. Your base photo doesn’t have to be a silhouette, but the best base photos have a lot of contrast, like a black object on a white background.
Tell the camera you want to take a double exposure.
The exact steps for taking a double exposure image in-camera will depend a bit on what camera you use (unfortunately, not every camera has this feature, either). For the exact steps, consult your owner’s manual, but you can often find the feature just by hunting around a bit. On most modern Canon and Nikon DSLRS, taking a double exposure is done by going into the menu and locating the double exposure option and turning it on. Then, you’ll be prompted to select a base photo, so go ahead and select that high-contrast image you just took.
Many cameras also have a few more options to choose as well. The blend mode determines how those two exposures are combined. “Additive” combines both exposures, so you’ll want to underexpose that second image a bit. Some cameras will also allow you to choose how many images to expose together—so you can have a triple exposure, for example. Have fun and experiment with the different options.
 Take the overlay photo.
Once you’ve told the camera that you want a double exposure and have chosen your first photo, it’s time to scout out the second image. The best images to overlay have lots of pattern—like tree branches, or a brick wall. Ideally, you should also be able to get a white background in the same part of the frame as you have in the first photo. An easy way to do that is to use spot metering on a backlit subject and overexpose the sky. It’s not necessary though, and you can get creative with that second shot.
To get the best results, use Live View mode when you are taking that second photo. You’ll be able to see the first photo on the screen with the second one overlaid, so it will be easier to make a decision on how to compose that second shot.
Let the camera do the dirty work.
When you take a double exposure in-camera, the camera will merge those two photos together, no Photoshop required. You will probably notice a slight delay as the camera merges those two files before you can take another shot. Of course, you can still open up the image in Photoshop and do some tweaking if you’d like, but you still save time by having the camera do the bulk of the work for you.
Taking a double exposure image is easy (if you have a digital camera with a double exposure mode). To get the best results, try using one image that is a high-contrast silhouette, and a second with a lot of pattern. Double exposures are creative ways to explore photography and pay homage to a technique prevalent on film cameras.
Looking to sharpen your photography skills? Join our top-rated professional diploma in photography today!


