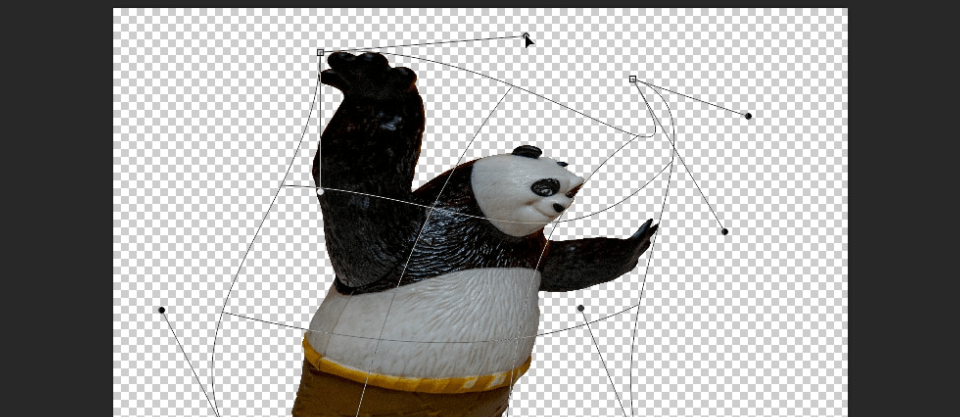
Free Transform Tool in Photoshop
Free transform is a very unique and versatile tool in Photoshop that comes in very handy, especially with photo manipulations. Its one little function that can do several things to your images and cut outs.
Activating free transform
Free transform works on layers, individually. To activate free transform, select the layer from the layer panel and press ctrl+t on the keyboard.

You will see that a border has appeared on your layer. Right click on the image and you will see several options there.

Let’s understand what these options are meant for.
Scale
This is activated by default, the moment you press ctrl+t on the keyboard. Click and drag the tiny squares around to alter the dimensions of the layer according to your wish irrespective of preserving the aspect ratio (height to width ratio). If you want to increase or decrease the dimensions of the layer without disrupting the aspect ratio, then hold down the ctrl key on your keyboard and then click and drag the tiny squares. This will change the dimensions but will preserve the aspect ratio.

Rotate
This will help you rotate only that particular layer without disturbing the other layers as you see fit. Click and drag the corners of the frame to rotate the image. Rotate is also activated by default along with scale when you activate free transform. While scaling, click and drag anywhere outside the frame to rotate the image.

Skew
Dragging the corners around after activating will alter the frame only according to that particular point. The layer will alter itself accordingly to fill the frame making the image in the layer skew. This will help you stretch the layer in any one particular direction giving it a skewed shape.

Distort
Distort works similar to skew, the biggest difference is that dragging the edges in skew will only shift the layer edge up and down. But in distort. you can even stretch and compress.

Perspective
Not to be mistaken with skew. Perspective works a little differently than skew and distort. When you drag the corners of the image after selecting perspective, the opposite corner moves in the opposite direction transforming the layer as it’s been seen from a different perspective.

Dragging the corners will alter the distance of the converging point of the pov. It can make it go farther or come nearer. Dragging the edges of the frame will move the converging point of the pov from left to right if you move the top or the bottom edge and up or down if you move the left or the right edge.

It might sound a little tricky but try it yourself. You will get the hang of it.
Warp
You will love the warp tool. It can alter the layer however you want. When you select warp you will see that instead of just a frame, it now has a grid.

You can click and drag around any point in the grid to alter the layer.

Rotate 180/90 cw/90ccw
Rotate 180 will rotate the layer by 180 degrees without affecting the other layers. Rotate 90 degrees cw will rotate your image by 90 degrees in the clock-wise direction.

Rotate 90 degrees cw will rotate your image by 90 degrees in the counter clock-wise direction.
Flip
It’s like using a mirror. Flip horizontal will create a mirror reflection. If the image in your layer has a model look to left, after flipping horizontally, it will now be looking at right.

Flip vertical will change the layer to its mirror reflection as if the mirror was placed above the layer. It will make your layer go upside down.

Make use of free transform
All the features that free transform has to offer can be used in a very creative way in many photo editing, retouch and photo manipulation work flows. In our future posts, we will be putting free transform to use in more ways that you can imagine. Stick around!
Looking to sharpen your photoshop skills? Join our top-rated online photoshop course today!


