Everyone loves to snuggle up with their fluffy canine companion(s), especially when they are freshly clean and smell great. But, what do you do when your dog starts looking like a dirty version of Chewbacca from Star Wars and you can’t get to the groomers?
Well, by following these basic DIY dog grooming tips you will be able to groom Chewy yourself!
What tools are needed for dog grooming?
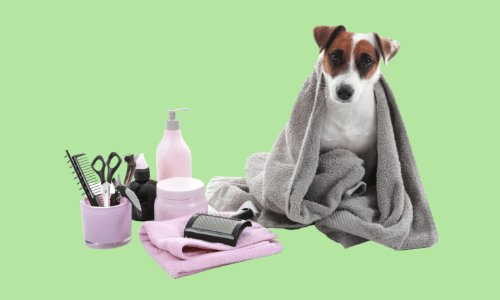
Before you groom your dog, you will require the following equipment.
For bathing and drying, you will need:
- A comb, brush or shedding blade (depending on your dog’s coat)
- Dog shampoo and dog conditioner (according to your dog’s skin type)
- Towels
- Handheld hair dryer
For grooming, you will need:
- A dog nail clipper and a nail file (a standard “human” nail file will also work)
- Dog electric clipper with blades and combs (depending on how short you want to cut the coat)
- Dog scissors, thinning scissors
- Styptic powder (to stop nail bleed)
- Grooming table (optional)
Kindly note: You do not need to have the best or most expensive equipment, as long as it gets the job done!
Learn Dog Grooming and Nutrition
Learn essential dog grooming and care skills, from basic doggy anatomy to body language and nutrition.
Why is dog grooming important?
Regular grooming at home is important to familiarise your dog with the process and to get him/her comfortable with the routine. Regular grooming also reduces shedding and improves the overall health and appearance of your dog.
How to groom your dog at home
Start by brushing your dog’s coat to remove dirt, debris and separate the hair strands from each other. To do this, brush the hair upwards for the best result. Remember, brushing is the key to keeping a dog clean. Your choice of brush should be determined by your dog’s coat. In general, I would recommend using a slicker brush for dogs with longer coats and a bristle brush and deshedding glove for shorter coats.
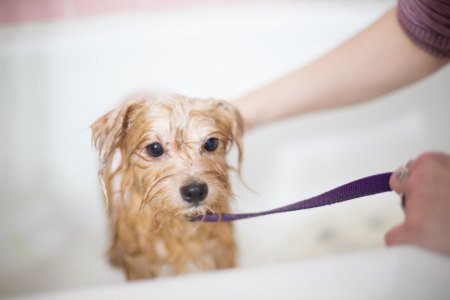
Bath time follows after brushing. For this step, ask your vet to recommend the best-suited shampoo and conditioner for your dog’s skin type, and make sure to use fragrance-free shampoo around the eyes because fragrant shampoo tends to burn a dog’s eyes while some scented shampoos can irritate sensitive skin and the nose. After bathing, towel-dry your dog and use the same brushing technique while using a handheld hair dryer to fully dry the coat.
Once your dog is washed and brushed, it’s time to give him/her a trim. Place your dog on a non-slip surface or grooming table, and remember, much like a baby, never leave a dog unattended. Use professional scissors to trim the desired area. Straight scissors are commonly used for trimming while thinning scissors are used to reduce hair volume. When trimming the ears, always have your other hand on the edges of the ears so you know exactly where to cut and avoid any accidents. If your dog’s fur is matted, don’t try to cut it with scissors, use clippers instead.
How to shave your dog
If you would like to shave your dog at home, find a quiet spot devoid of distractions. First, decide which length you would like to cut the coat as every blade number cuts a certain length. You will find all the information about blade numbers and length in Module 1, Lesson 3 of the Upskillist dog grooming course.
Once you have decided on the desired length, start to shave from your dog’s neck, working your way down the body, keeping the blade flat against the skin. Don’t push the clippers too hard against the body as the blade should only just touch the skin — the clippers will do the work with your hand guiding it.

Be careful around the underarms, hocks (thigh and hip) and especially where the stifle (the joint above the hock in the hind leg) meets the belly. Do not allow these areas to enter the spaces between the blade teeth. I would recommend using a no. 10 or no. 15 blade for the underarms and private areas and check the blades often for heat, as they can get hot and burn the skin which we call clipper burns. It is important to note that if you feel uncomfortable or unsure when it comes to shaving your dog at home, leave it up to the groomers to complete this step for you.
How to cut your dog’s nails
Now, it’s time to cut those dreaded nails. Most dog owners are naturally scared to cut their dog’s nails because, if cut incorrectly, the nails can start to bleed. While I explain how to correctly cut a dog’s nails in the Dog Care, Grooming and Nutrition course, for those of you who would like to cut your dog’s nails sooner, here are some helpful tips.
If your dog has white nails, clip until you see pink (known as the quick), and if your dog has black nails, clip a little at a time until you see a solid black dot on the tip. Do the cutting motion quickly because clipping slowly can cause chipping. If you do clip the quick, don’t panic. Use a styptic powder such as Kwik Stop on the bleeding nail to stop the bleeding as soon as possible.
And there you have it. Some essential DIY dog grooming tips so you can groom your dog at home. I hope these quick tips will help you turn your dirty Chewbacca back into a beautiful Princess Leia!
For full demonstration videos on how to groom a dog and specific breed styles, including knowledge on dog nutrition and care, join the Upskillist diploma in Dog Care, Grooming and Nutrition today. On completion of this course, you will be the top dog in grooming!