A beginners guide to knitting
Before we can pick up our needles and knit up a storm, we need to familiarise ourselves with the different materials and tools we’ll be using. The first step of knitting is understanding the fibres. Each fibre has benefits and negatives. They play a crucial role in selecting what to use while knitting.
According to the Merriam-Webster dictionary, yarn is a continuous, plied strand composed of either natural or man-made fibres or filaments. It is used in weaving and knitting to form cloth. The ply refers to the number of strands twisted together to create the yarn. The more plies the yarn has, the thicker it is.
Different yarn fibres
Wool
While any wool can be yarn, not all yarn is wool. Wool is a specific fibre derived from the sheared coat of sheep. Traditionally, natural fibres are preferred. Synthetic fibres are quite a recent invention with the advent of plastic manufacturing. When we think of natural yarns, the first thing that springs to mind is sheep’s wool. It has been used in the production of fabrics for hundreds of years and is still one of the most popular natural fibres. We also find yarns made from fibres like alpaca wool, angora from goats and rabbits, mohair and cashmere from goats, and silk. Alpaca has rapidly become more popular in the knitting world as an alternative to traditional sheep’s wool as it is less scratchy than ordinary wool.
Blended fibres
Blended fibres are accessible and affordable options. They are a combination of natural fibres and synthetic fibres. If you are sensitive to animal fibres, then a blended yarn will mitigate the scratching effect of the wool. Not all Synthetic yarns feel the same. Synthetic yarns are incredibly versatile, and you can use them for all knitting projects.
Synthetic yarn
Synthetic yarns may not sound as luxurious as natural yarns, but they have a vital role. Most important are access and affordability. They will always be easy to find in any yarn shop or haberdashery, while your specialist natural fibres, like silk or mohair, will be much harder to find. You can find synthetic yarns anywhere and at any price.
Synthetic yarns are less likely to cause a reaction to your skin and can often be more tolerable for babies. They are also usually machine washable and can tolerate higher temperatures.
Beginner knitters often feel like they are doing something wrong by purchasing cheaper Synthetic yarns. It is a myth that one is superior to another. The best one is the one you like knitting with and wearing. It also makes sense to try out your new hobby in a more affordable medium while honing in on your skills.
I would recommend using affordable synthetic yarn. You might be pulling out a lot of stitches as you learn, which is perfectly normal for any knitter. Synthetic yarn will often take the beat of being knit and re-knit without damaging the fibres. Save the luxury yarns for your final project or your first fancy knitted gift.
Yarn thickness and knitting needles
Yarn comes in a variety of different thicknesses. You won’t want to use super thick wool for a pair of socks as your feet wouldn’t fit in your shoes. Using fine yarn for a blanket wouldn’t be very practical as it wouldn’t keep you very warm. Each yarn thickness, or yarn weight, is appropriate for each different project. A knitting pattern will tell you the required weight of yarn.
It is vital to match the thickness of yarn to the corresponding thickness of the needles. The basic rule is that the thicker your yarn, the thicker your needles. The thinner the yarn, the thinner the needles. If you are knitting from a knitting pattern, it will provide the needle size required to knit that item in the correct gauge to get the size you want. To knit something without a pattern as a guide, you can use your yarn label to guide you. By doing a quick check of the needle size recommendations on your chosen yarn, you can make an educated decision about which needles you want to use.
Picking a yarn for your project is very rarely something you’ll have to do without a helping hand from your pattern. A knitting pattern will state what weight to use and how much you’ll need. But in some cases, it will tell you the brand and colours to buy to get the same result as the designer’s sample.
Flat and round knitting
There are two ways of knitting: flat or round.
Knitting flat is what you probably think about first when you think about knitting. It’s knitting rows back and forth until your knitting is the length you need. Knitting continuous circles is known as knitting in rounds.
Straight needles are the traditional needles you’ll be used to seeing. You can knit flat on any needle, but you cannot knit in the round on straight needles. You can only knit back and forth in flat rows. Bear this in mind when you get needles for your first project.
Plastic needles are a great starting point and are often used to teach children and beginners to knit. Plastic needles are grippy or sticky. Your yarn sticks to your needles which slows your knitting speed down. It also reduces sliding.
Continental style knitting or picking
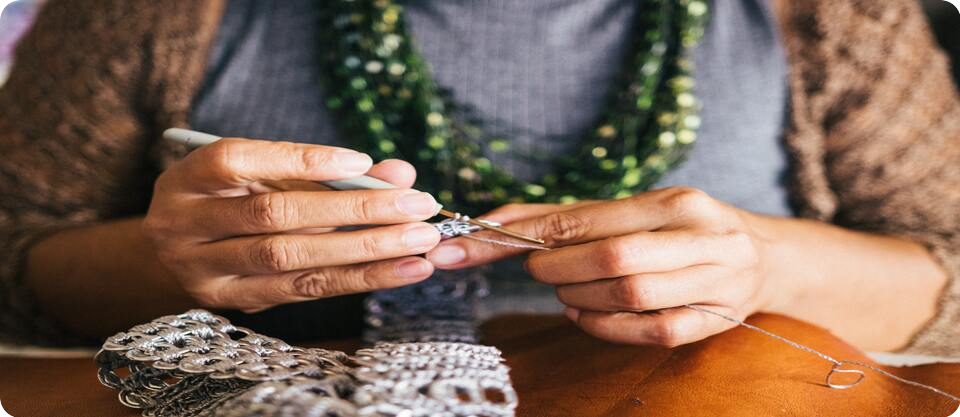
Continental style knitting is when you hold your working yarn in your left hand. Instead of moving it with your right hand and looping it over your left needle, you use the right-hand needle to pick up the yarn held in your left hand. It is known as picking. It will be more comfortable if you already know how to crochet. The motions are very similar. The continental style is my preferred method. Once you have mastered this style, you’ll find it’s faster and is better for your hands in terms of long-term strain.
First steps to your first stitch
To make stitches, you need to move your yarn over the tip of your needle to make another series of loops. It is not as complicated as it sounds. You’ll need to hold your working yarn in either your left or right hand. The working yarn is what you use to make your new stitches. The tail is the short dangling yarn end. The working yarn is the yarn still attached to the ball or skein. Your working yarn must always be at the end of your needle, where the tip is, the pointy end.
Cast on twenty stitches
Get your yarn onto your needles. You need to cast on twenty stitches. We do this to give us a nice-sized square in the end.
Holding your yarn
- Hold the empty needle in your right hand like you’re holding a butter knife.
- Hold the needle with the stitches on loosely in your left hand in the same way.
- Don’t hold your needles too tightly. Imagine that they are brittle similar to chalk or dried spaghetti.
- Place your left thumb gently on your stitches to hold them in place, then point your left index finger along the length of your needle.
- Put the working yarn over your index finger and put your other three fingers on top to anchor the yarn. Hold it loosely but firm enough so that it doesn’t get away from you.
The anatomy of a stitch
It’s important to know that every stitch contains a front loop and a back loop, creating two halves of a loop. The one half is in the front, closest to you, and the other half is away from you. We’re almost there. Knitting through the front loop means that your right needle goes just behind the front loop.
Making the stitches
- Take your right needle and stick it into the first loop on your left knitting needle. It goes between the front and back loops.
- Use the tip of the right knitting needle to scoop up the yarn looped over your finger.
- Pull the yarn you’ve snagged back towards you through the loop on your needle.
- Carefully slide the loop off the left needle, keeping the new loop of yarn on the right knitting needle.
Final steps
Knit to the end of the row. Now all the stitches are on your right-hand needle. Switch your full needle to your left hand and do it all again. Count your rows as you go. You can note them down on paper or even make a little pile of coins or paper clips. Knit twenty rows. It’s not the end of the world if you lose track or forget to count a row. You want to aim for a square shape.
See the bumpy textured fabric you’re making? That’s called a garter stitch. Congratulations, you have learned your first stitch!
Are you interested in learning more about knitting? Sign up for our Hand Crafts Course.