Most of us may think that Lightroom is just a glorified extension of Photoshop camera RAW, but Adobe has very good reasons behind developing Lightroom as a separate entity.
The name Lightroom itself is a play on the original photography term; the dark room. This might be a news flash for younger photographers but the truth is, before digital photography took over, it was done on photosensitive films. A roll of the film would be placed inside the camera and all the picture would get recorded on it. Such images captured were called negatives since they were just an impression of light created on the film by burning it selectively. This limited the number of shots you could take per film. Great care had to be taken not to expose these films to day light to avoid further burning of the films. That is why the negatives were taken out and developed with chemicals in special rooms called the dark rooms that had very low light.
And now, since we develop our images out in the light in the comfort of our own homes, Adobe chose to term this product as Lightroom.
Lightroom hacks
Knowing your way around a software will make it more user-friendly. Knowing shortcuts, will save you a lot of time.
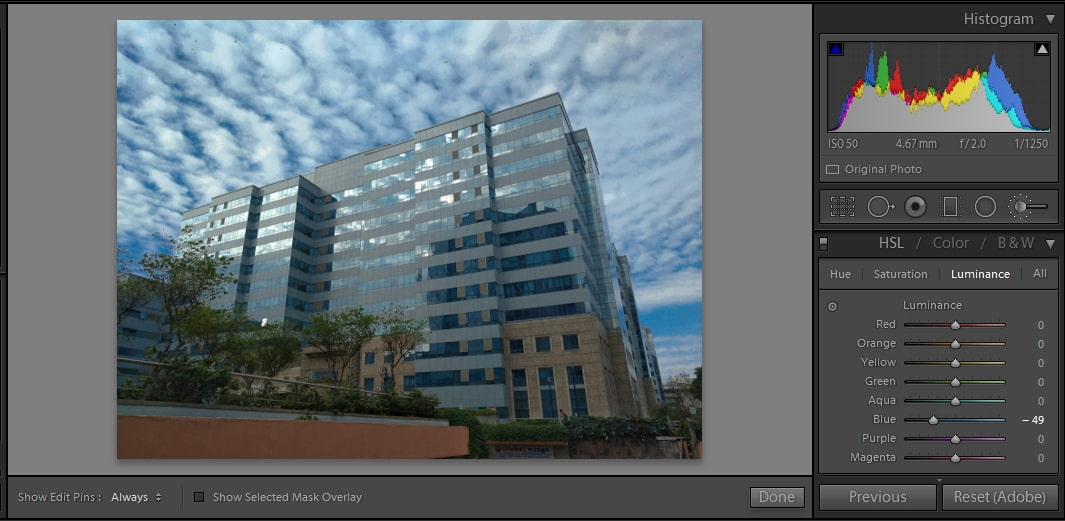
1. Restore sky details
A sunny day with abundant clear sunlight might seem like a good day to take pictures with the beautiful blue sky in it. However, while you are trying to get the exposure right for the main subjects, the sky may get blown out. The easiest way to fix this in Lightroom. Navigate to the luminance panel and reduce the luminance on the blue colour.
2. Adjustment brush stacking
The adjustment brushes in Lightroom let you do selective adjustments to your pictures. The best part about these brushes is unlike Photoshop brushes, the changes that these brushes make are non-destructive. That means you can go back and edit the changes you made any time.
So if you were to reduce the sharpness of a particular spot in an image, you can use the selective adjustment brush and mark the area on your image. And if you want to intensify the effect, you can place multiple brush points nearby and amplify the effect. Each brush placement is represented by a dot. You can go back to the changes that these dots made any time by clicking on them and you can edit the changes individually any time. You can also hold your mouse over each dot to see its coverage.
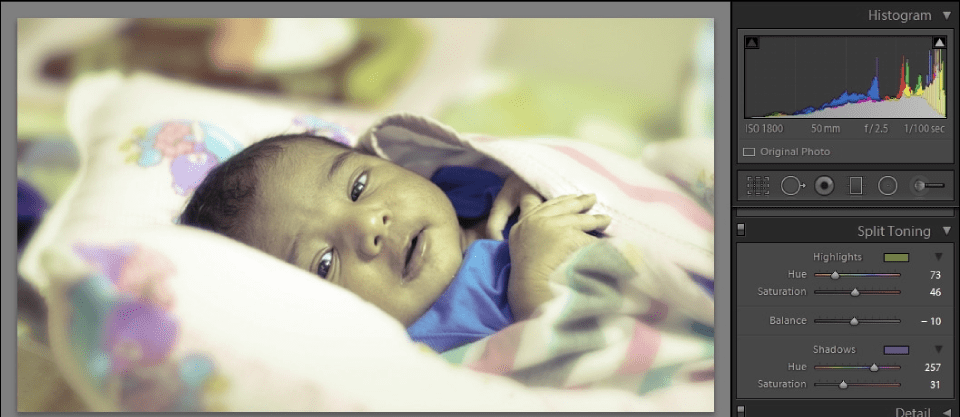
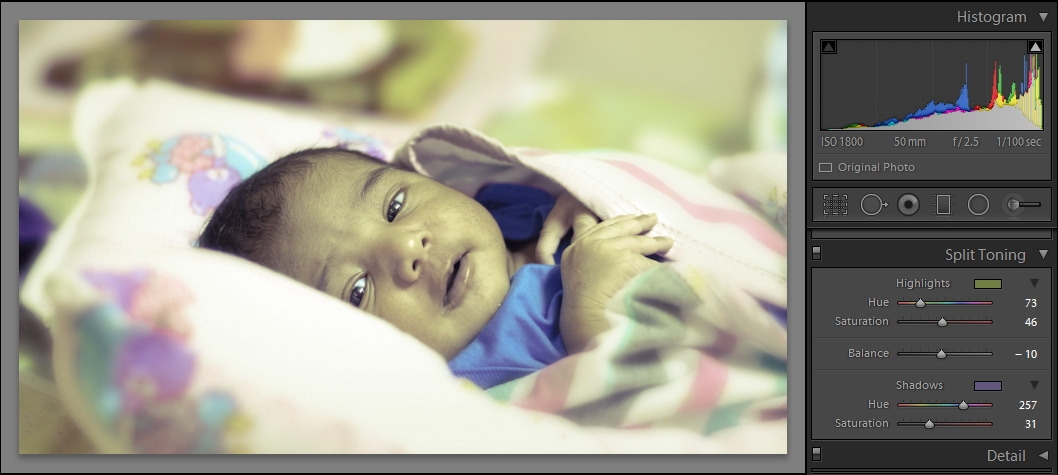
3. Split toning
This is the rave among photographers these days. Even if you haven’t heard of the term you must have definitely seen the pictures. It’s popularly known as the retro effect among smartphone photographers and instagramers.
Split toning is basically the process of adding colour to shadows and highlights on an image. Since two different colours are chosen, one for highlights and one for shadows, it’s termed as split toning. Scroll down to the split toning panel on the right side bar and you will see that there are hues and saturation sliders, two each for shadows and highlights. It might look confusing, as you try to dabble with these four sliders along with the balance slider in between but there is something common in most of the split-toned photos.
For highlights, the hues slider is normally at the second scale point from left and for the shadows it’s at the fifth scale point. This should give you an idea where to start. Play around with the saturation sliders and the balance slider to see what works best.
Every image is unique and what works for one image might not work for another, but at least this trick will give you a starting point. Experiment for yourself.
4. Lights out
If you ever feel distracted with all the sliders and sidebars in the Lightroom interface and feel that it’s distracting you away from your picture, just hit the “L” key on your keyboard. This will dim away everything else but the picture. You will still be able to use the slider but it will bring your focus to your image.

You can also try this on the grid view in the library. Select the images you want and hit the “L” key on the keyboard. Everything but the selected images will dim away.

5. Solo mode
To help reduce clutter, you can use the solo mode. This will automatically collapse the current developer panel as soon as you start using another panel. To activate solo mode right click on any of the available panels and select the given option.

6. Lightroom keyboard shortcuts
Just hit these keys to active the desired view in Lightroom
G – Grid view
E – Loupe view
C – Compare
D – Developer
F5 to F9 – toggle developer panels
Double click on slider – Reset slider position to original
Ctrl + enter (grid view) – Start slide show from the selected image
- To straighten an image while cropping, hold down the control button and drag across a straight line in the image.
- Move the slider using the direction keys on the keyboard. Hold down alt and then hit the direction keys for small changes. Hold down the shift key for large changes.
- To view Lightroom shortcuts anytime, press ctrl + /
Try out these tricks first on something that is not so important. Once you familiarise with them, you can start using them on all your projects. To practice the keyboard short cuts, avoid using the mouse. Plug it away if you have to. Only if you force yourself not to use the mouse, you will get the hang of using keyboard shortcuts.
Looking to sharpen your lightroom skills? Join our top-rated professional diploma in adobe lightroom today!


